Wednesday, July 22, 2020

The Plumbing is Happening

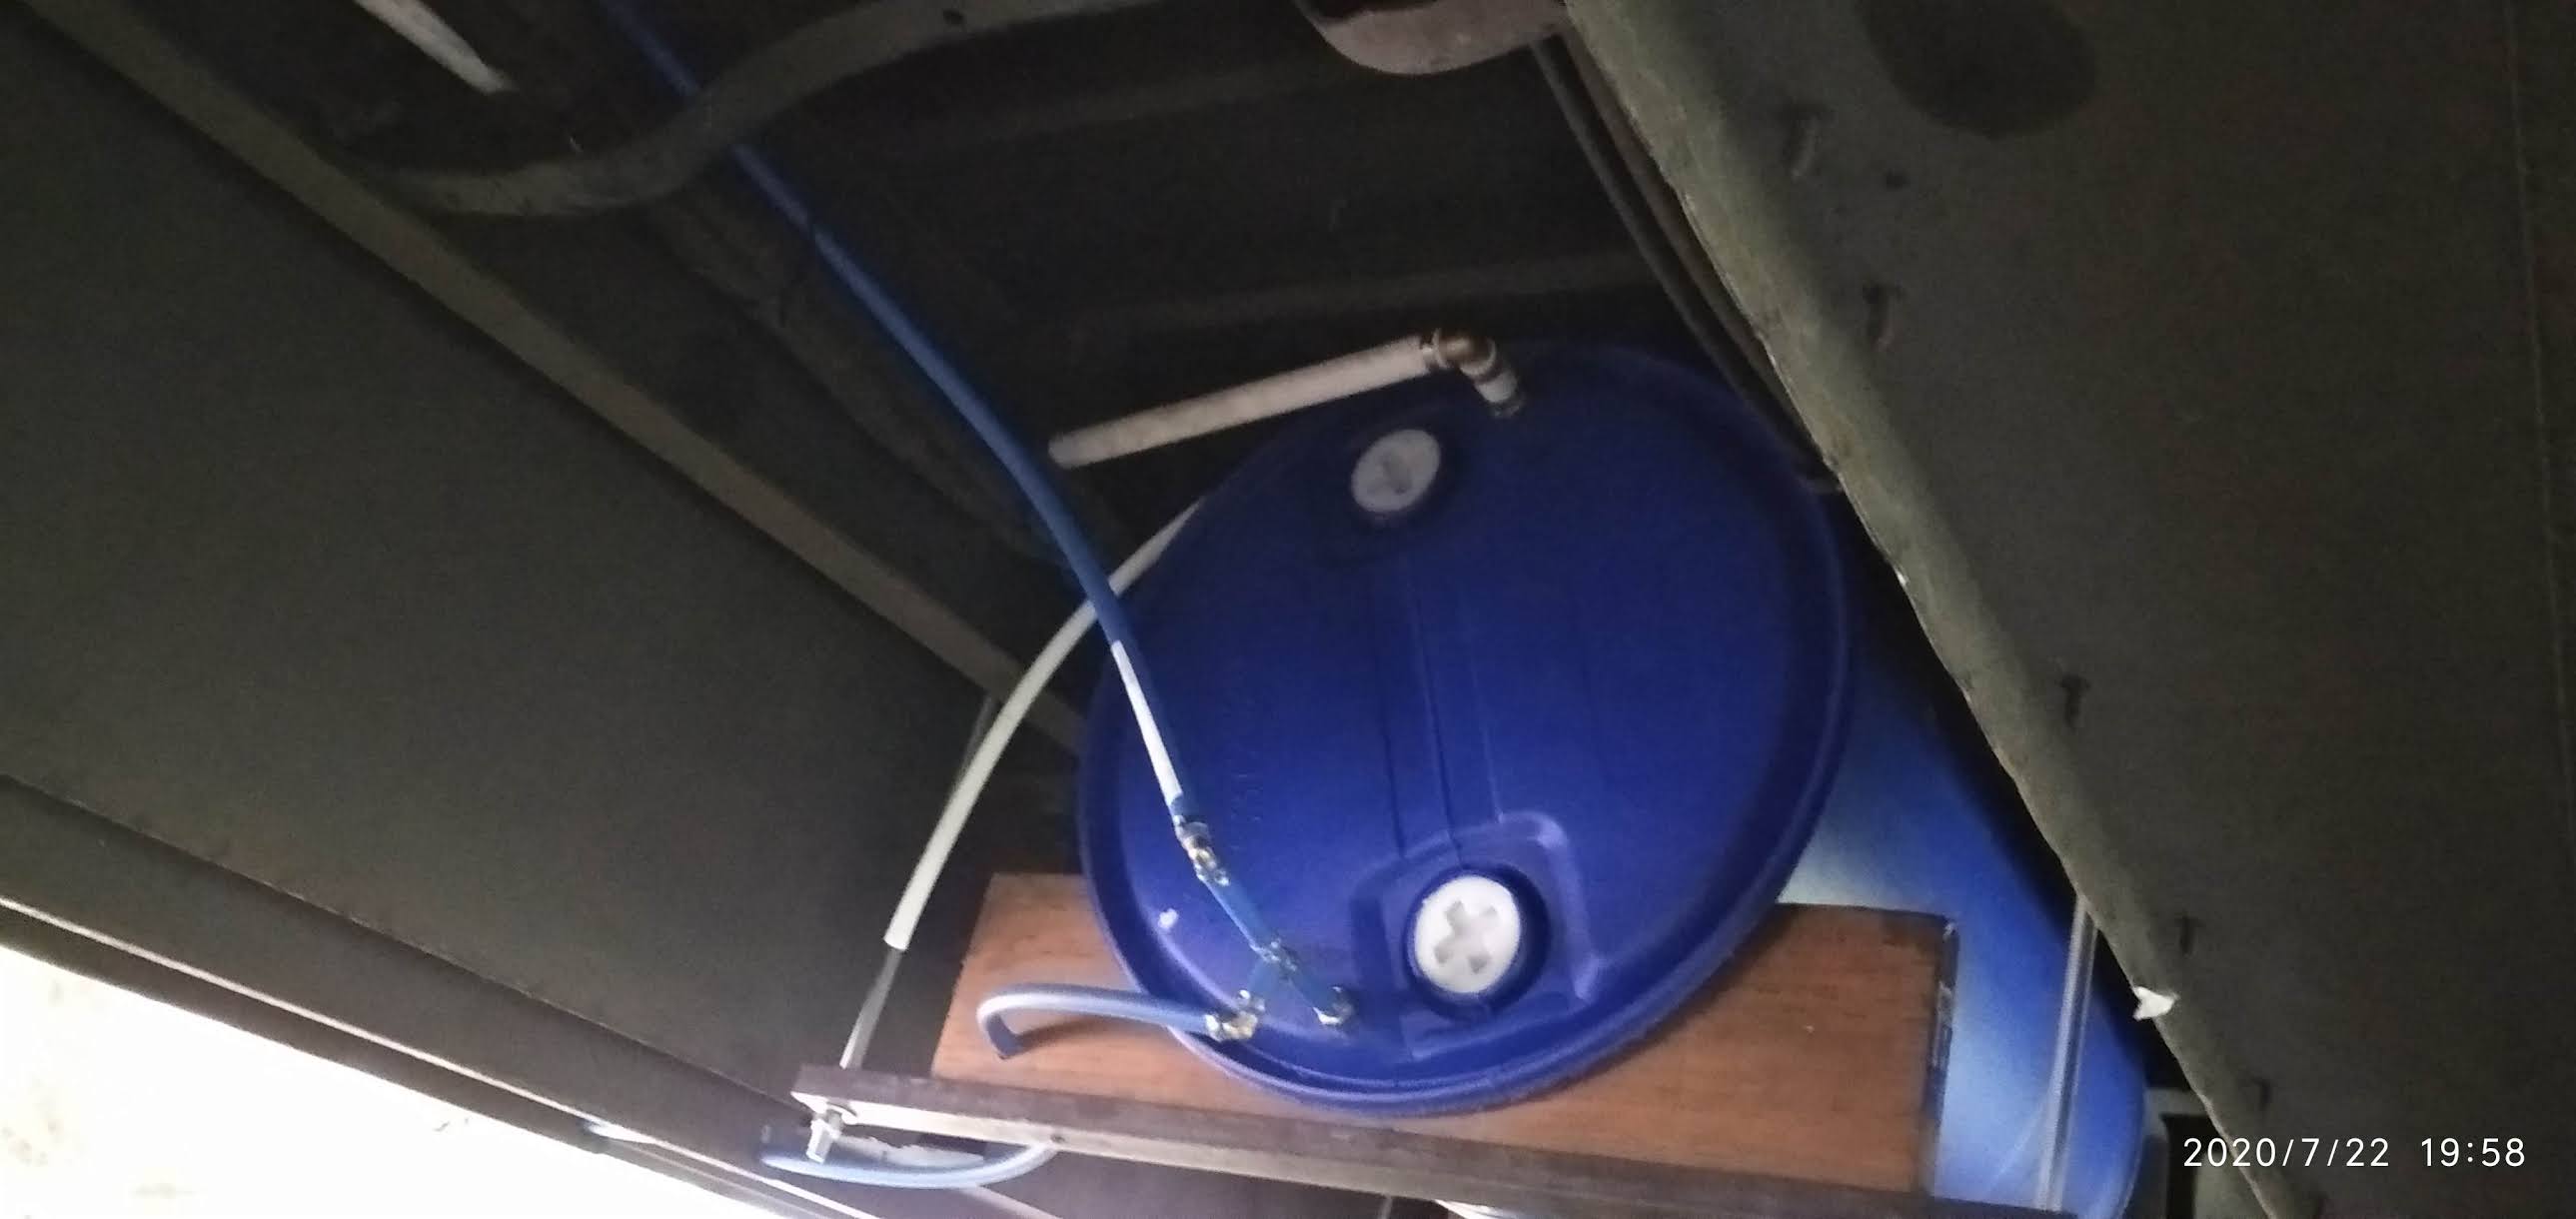
The guys wanted to finish the plumbing first. So first was to put the barrels underneath. I pulled the bus down the street, over a dip at the bottom and had just enough room. 3 barrels under. Then back in Wyndi's driveway. 


Add caption

Adjusting the barrels up it became obvious that only 2 barrels will fit. Back down the street to the dip and take out one. And back in the driveway.


The gray water tank plumbing from the shower. But from the sink is not visible.


The fresh water tank plumbing includes a vent, fill, drain and line to the pressure pump.


Inside is an instant on hot water heater on the floor, pump and pressure tank in the corner and the back of the shower.


So we are making progress again.

Thursday, July 16, 2020

Water Tanks

I hired a contractor to finish up the bus. So the first thing is water tanks underneath.

There's no room inside for them, so I'll hope we don't let them freeze.

I decided to go with 55 gallon blue plastic barrels. Two for freshwater and one for the kitchen sink and shower drains.


He has them all ready including the brackets and support blocks.

There's a catch though, they are too big to fit under the edge of the bus.


We plan to drive the bus over a dip in the driveway so that they can slide the barrels to the center where they will be up between the chassis frames.

Sunday, April 26, 2020

Lower Bed Frame and Shower Walls

It doesn't seem like I did much this week. I had decided that the bed frame was too high. The mattress was thicker that I thought it would be when I made the frame. I lowered it by the width of a 2x4. So now I hope the pillows will not fall off the head onto the shelf in front of the window. The night stands may be a little more accessible now too.

I finally cut out the shower walls and set them in for a test fit. I may wait until I have the plumbing to install them permanently. I want to put spray foam insulation around the bottom to keep any bugs out from under it too.

k.

Sunday, April 19, 2020

Toilet Getting Close - About 11 Weeks


The shower hasn't changed much the past few days. I put up the back wall with only a few screws cause I figured I'd forgot something. Yep, forgot to add the insulation in the bottom 10". So next will be to try again. The curved piece below left is the roof pattern for cutting the wall boards.


The first coat of stain and Wipe On Poly, polyurethane. You really can't quite see the seats and shelves up on the front wheel well.


The shelves in and the seat in place. I've yet to install the hinges. Haven't decided how to finish the upper wall. I may have a shelf above the window to integrate too.


The view from just forward looking back. I like the brick wall. It will get trim on the outside corners.


Being in lock-down, I can't take advantage of Eldon and Chip's shop. So I found a used table saw on OfferUp. It's a 9" saw but only came with an 8" blade, so it will not cut a 2x4. I need several pieces of outside corner molding and they are more than $7.50 each at Home Depot. $40 for a saw, so I can make my own for less.


Here's a video tour to date. I had to reduce the size before blogger would upload it. There is getting to be no room to work inside any more. I'm going to have to stop and cleanup soon!


The time-lapse of the past week or so. I had a lot of battery problems with the little camera. And the wor on the toilet area is behind the wall!


Friday, April 10, 2020

Shower Wall Frame and Toilet Seat

I got stuck on the shower so I went back to the toilet some more. The basic part is almost done now. Both tops open on hinges. The toilet seat for access to the composting bucket and some small storage. The smaller near side opens to a storage compartment for the peat-moss and compost litter.  Staining and polyurethane yet to go. And of course the walls. The clothes closet on the far side is still a dream that is not complete.

Composting toilet

Then I went back to the shower stall. Finally decided how to put up the hall wall frame. And the frame for a narrow cabinet on the near side. And shallow shelves on on the back side for bedroom clothes storage. Of course an original speaker and an overhead light fixture were directly in the way. Not sure about the speakers, but the lights will be converted to LEDs if not completely removed.

32 x 32 shower stall.
And a view of both. It is begining to look like I am doing something now. But I'm sure it will slow down again.


And last, the video of an old guy with saggy pants.


Monday, April 6, 2020

Shower Pan

The wainscoting is up by the bed now. A little more insulation is up too. Still need to make the trim and molding. So there is lots more to do.

Starboard by the bed.


I decided to sink the shower pan an inch into the sub-floor to give me a little more headroom. I cut a 3 inch hole in the floor! Then I had to make it 4 inch! Arrg.


Now I can stand in the shower and my head just touches the roof. It is just sitting in place ready to build the walls and attach. There are no tanks, plumbing, pumps or anything yet.


But now I can start designing the walls.

And the video ...

Sunday, April 5, 2020

April Fools

A little more work on the starboard side by the bed. Ready for the wainscot, the white beadboard to cover the foam insulation.


Trinda insists that she wants wood trim in the upper corners above the windows. Possibly 12 inches of cedar tongue and groove.

 And the time lapse:


A few days thinking, trying to decide on the design and placement of the shower. I finall decided the drain has to miss the beams and storage compartment below and the way the wall studs next to the windows should be placed.

Then I realized that the 110 volt wires need to be passed through the overhead to the other side. So I paused and fed the wires across, leaving plenty extra on each end. I don't know where the inverter is going to be or which circuits should be on separate  breakers.

So here is the next time lapse as of today, Apr 5.


Monday, March 30, 2020

Bedroom Wainscot and Insulation

I took down the sheet metal in the transition between the windows and the ceiling in one place to inspect. Trinda would like wood trim there instead. I can't decide. Not that removing the toilet area and starting over on it would make a difference in the decision. But it does delay any more work that would reach that area.

I insulated the walls with 1" foam insulation because I need all the room I can get to walk over the wheel well and beside the bed. I'm still planning a nice looking window sill, whatever that is ...

And probably a shelf for storage above the back window.

Port side bedroom wainscot and nightstand

I didn't accomplish much the past few days, but here it is. I had to edit out hours of sitting and staring at the walls,trying to figure out how to do the next steps.

I ask Steven to help with parts of it today.


Thursday, March 26, 2020

Seventh Week: A Brick Wall

Some visible progress for a change. I started with the starboard forward wall and wheel well but didn't make much progress. Guy and I insulated them with R-8 fireproof bats. Today I finally got the 115 volt outlets and wiring in and put up the "brick wall" paneling. I have yet to install the cedar trim on top. It is just balanced there now.

Starboard side from front looking back


Starboard side aft looking forward

I have not shown a picture of our new mattress on the bed frame so here it is.

Our new queen mattress, still in the wrapper.

And I have been working on the area for the toilet and closet. It will be a composting toilet. There will be a closet and shelves beside it.

Starboard side aft of the wall and emergency exit

Also, the time-lapse camera is still running part time. The battery died for a few hours when I didn't notice.

Wednesday, March 25, 2020

Sixth Week: Toilet Started

(Week 6 of actual work, here may have been a week or so lost to the Coronavirus...)

Here is a time-lapse video of a couple days at Wyndi's. Lots of thinking and designing and not much work.

I made a time-lapse camera from an ESP32-CAM and mounted on the front bulkhead of the bus, looking back.

Wednesday, March 4, 2020

Fifth week: Nightstands and Wheel Well Covers

I finished the nightstands and stained them a light walnut. It soaked in more than I thought so it may take more ...

One for each side of the bed
Also insulated the rear wheel well covers and boxed them in. They are in kind of an  unfortunate place. We will have to step up and walk around to the sides of the bed.

I also started insulating the walls. In the back we need all the room possible to walk beside the bed. So the plan is one inch of foam insulation beside the bed.  Then wainscot up to the middle of the window, just to where the top of the window opens downward.